Using a presenter as part of your video production

Presenters can be an excellent way to showcase and front your video. They are especially effective if the presenter is linked in some way to your product or company. For example we recently filmed a promotional video for a gallery in Stratford upon Avon and had Michael Portillo presenting the film, who is  the chairman of the UK art Fund.

The reason that this was effective is that you have somebody who is talking directly to your audience, making it a more intimate experience for the viewer, as opposed to using a voice over. (Not that their is anything wrong with voice over, when used correctly).

Presenters allow you to add another layer to the video by bringing in their personality and, at times sense of humour, which allows you to tailor the script, in parts to suit them.

Having a representative of the company as a presenter can also work well, so long as they are comfortable and natural in front of the camera. If they aren’t then it is always worth looking at filming them as an interview, whereby you can plan questions and edit their answers with footage so that they supply the narrative to the film without the fear of looking down the camera lens.

Whatever type of video production work you are looking at undertaking it is always worth speaking with the production company, looking at examples of their work that are more specific to your video, and structuring the film in the pre production stage to ensure that you create an engaging and effective film that is targeted to your desired audience.
Top reasons why exhibitors should use Video Production

If you are planning on exhibiting in the future and want a way to help draw potential customers to your stand, then video can be a very effective option.

So why use it?

1. The most obvious option is if you have a product or list of products that you want to promote and introduce to your customers. We recently created a video for a golf cart manufacturer. Obviously you cant demonstrate all that this can do in an exhibition hall so they used Dynomite Productions to create a 2 minute promo video that they can put on a TV screen on their stand that will play on a loop. The video showed a visual demonstration of the buggy being used, highlighting through HD footage and motion graphics the key selling points that they wanted to get across.

2. If you want to show your premises / process of manufacturing / equipment then a video can also be very useful. We created a video for a printing ink manufacturer to use on their exhibition stand. This allowed the sales team to give their customers a visual tour and demonstration of their facilities.

3. If you offer a service then video is a great way to demonstrate this. We are currently creating a 90 second promotional film to be used in a chain of shop windows that show a new type of waxing process. The video will encapsulate how the process works and the benefits of it.

4. The majority of videos used at exhibitions will not contain audio, as it is on a loop it could become distracting and frankly annoying very quickly. However, what this allows you to do is then add a voice over, presenter or talking head interviews that can then go on your website  on a CD-ROM / DVD to hand out to customers at the exhibitions or platforms such as youtube, which can be used to help generate new business.

If you are planning an exhibition and want to discuss how video can benefit you please call us on 0115 8292 999 or email via the form on the contact page.

To have a look at some of our commercial productions and videos that have been used on exhibition stands go to the Dynomite Productions Commercial productions page.

What a difference the day makes

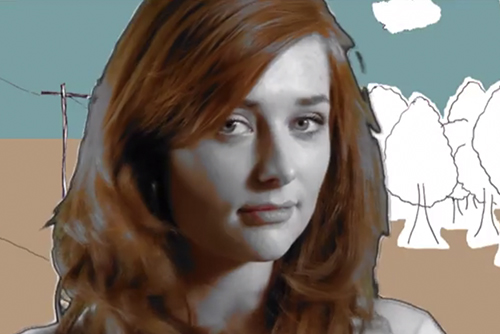
We recently filmed a music video for the amazing up and coming  duo Miss600. We were fortunate to have access to a rooftop location that overlooked Nottingham City centre and lucky that it didn’t rain, and as it was late afternoon the light was beautiful and not too harsh, but it was hard to get definition between exposing for the lead singer Hannah’s face and exposing for the sky. So we decided to add the clouds in post production. Here is a little tutorial on how to do this effectively.

1. First we did an offline edit and so new the exact shots that we were going to use for the roof scenes.

2. We then brought the shots into after effects

3. Next we looked through our stock library of moving sky and cloud images until we found the right one that suited the scene.

4. In after effects we placed the sky in the correct place and applied a multiply mode, so that it only affects the light areas.

5. We then used the masking tool to outline around Hannah and David on any areas where the sky was too obvious.

6. We then created numerous adjustment layers that were applied to either both the sky and the video footage or just the video footage that allowed us to grade the image so that it not only matched the sky but had a more film look to it.

Even though this was shot on true HD, even the smallest amount of post production digital grading and manipulation of the image can make a huge difference.

You can also use mapping to align the sky to a point in the video which will mean that it will move with any camera movement, but that is for a different day!

Video Production Costs and Outline

If you are looking or thinking about having a video made there are some points that you should take into consideration.

1. Cost – It will help you and the production company if there is a rough idea of how much you want to spend. There is no set rule for how much a video will cost, this is down to amount of time that it takes and the quality of the work that you are paying for.

2. Idea – The idea, concept or treatment is the outline to your video, when looking to have a video made it always helps if you have some idea as to what you want to feature, but it is also worth going over the idea with the production company and seeing what creative ideas they can offer. That being said you can pass it over to the production company and let them create the concept so long as you can provide answers to a few questions, such as; who is the target audience? what platform will the film be shown on? How you want your company/brand/product etc to be represented?

These answers will affect all areas of the production from the storyboards, to the way that it is shot and edited.

3. Execution – As the client it is your prerogative to be involved in the production as much or as little as you require. Once the pre production stage is complete, and you have a clear idea of the video, it is the production companies responsibility to ensure that the idea is executed correctly.


Digital Grading, how to make video look like film

How do you make video look like film?

We have completed post production on our new feature documentary Finding Fatima.

This project was made over 8 months and  filmed in both the UK and Portugal. Because this is more of a doc drama we decided that it was important that it has a high end film look, this allowed us to distinguish it from other documentaries by making it visually unique and as the initial route to market is through DVD sales it needed to be a product that would stand up to other studio productions released around the same time.

This is how we did it:

Each shot is story boarded allowing us to work out character placement, lighting and view the scene as an entire sequence.

A lot of the re-enactment scenes were filmed using a green screen. This allows us to have complete control over the weather and can dramatically reduce the budget. It allows the film maker to put the subject in any environment that you want and with some good keying software and the ability to digitally generate backgrounds can look incredibly effective. If you are looking to film with green there are a couple of things which you should be aware of

1. lighting the character – make sure that you have a good idea of what the scene will be like that you are putting the character into. That way when you are lighting the character you know which direction the main source of light will be coming from and allow you to match the lighting in production, instead of having to go digitally change it in post.

2. Lighting the green screen – Obvious but, make sure the green screen is evenly lit, especially if there is going to be a lot of movement.

3. Cameras – HD cameras are better than SD cameras for green screen, obviously depending on the make.  One thing to remember is to expose for the subject not a balance between the green screen and the subject.

Once we had completed the production stage it was a matter of putting the film together for the offline edit, when grading a film its important to initially create the offline edit so that you don’t waste time and effort grading images that will end up on the cutting room floor, or nowadays in the desktop trash.

The on-line edit is where you look to grade the image. Digital grading is the post production process of manipulating the image to give it a more unique / film look. By utilizing post production software you are able to change lighting, colour, tone even parts of the image so that you are essentially, as the directors of the film say, ‘painting with pixels.’